
New Sod in the First Month: Water by Moisture, Weather, and Rooting
On this page
Quick answer
Water new sod thoroughly after installation so moisture passes through the sod into the prepared soil. During establishment, keep the root zone consistently moist but not saturated, adjusting for rain, temperature, wind, shade, soil, slope, sprinkler coverage, and grass type. Check beneath several edges rather than relying only on a timer.
As roots knit into the soil, gradually reduce frequency and water more deeply. Limit traffic, wait to mow until the sod is anchored and tall enough, and follow the sod grower or local extension guidance for the specific turf and season.

Garden Center at Tractor Supply
BurlingtonDes Moines CountyIowa
313 N Roosevelt Ave, Burlington, IA 52601, USA
Start on installation day
Install fresh sod promptly on prepared, lightly moist soil. Fit seams tightly without stretching, stagger joints, and fill small gaps so edges do not dry rapidly. Ensure full sod-to-soil contact using the installer’s recommended rolling or tamping method. Water as work progresses if heat or wind could dry exposed rolls.
After placement, irrigate thoroughly enough to wet the sod and underlying soil without creating runoff, puddles, or soft depressions. Inspect corners, edges, slopes, and zones near pavement because they often dry first. Flag sprinkler gaps instead of compensating by drowning the rest of the lawn.

Monitor moisture, not just the clock
Penn State Extension says lack of water is a common cause of sod deterioration and recommends keeping soil moist, not excessively wet, during early establishment. See its lawn establishment guidance. A fixed number of minutes is unreliable because sprinkler output and site conditions differ.
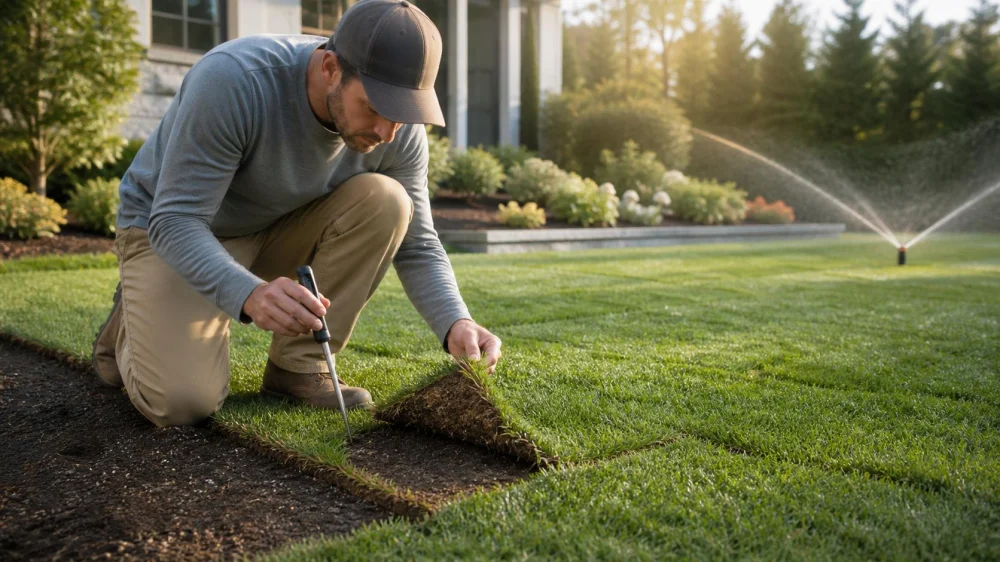
- Check moisture beneath multiple sod corners each day at first.
- Use short cycles on slopes or compacted soil if water begins to run off.
- Pause or reduce irrigation after meaningful rainfall.
- Check shaded and sunny zones separately.
- Repair overspray, clogged nozzles, broken heads, and uneven pressure.
- Record irrigation, rain, weather, and visible stress.
Watering very late may extend leaf wetness in some climates; local turf guidance can identify an appropriate time window. Follow drought restrictions and avoid irrigating pavement.
Use rooting to guide the transition
After roughly 10 to 14 days, University of Minnesota Extension suggests gently tugging sod in a few locations to check whether it resists lifting. Its sodding guide notes that timing depends on establishment. Do not pull hard enough to tear new roots.
When sod is firmly rooted, transition gradually from frequent shallow irrigation toward the deeper, less frequent pattern appropriate for established local turf. Keep heavy play, pets, equipment, and repeated foot traffic off weak areas. For the first mow, wait until rooting and height are suitable, use a sharp blade, and avoid removing more than one-third of the leaf at once.
Respond to warning signs
Lifted or curling edges, widening seams, a dull or wilted look, and dry soil beneath the sod suggest insufficient or uneven moisture. Squishy ground, persistent puddles, foul odor, soft turf, runoff, or yellowing with constantly wet soil may indicate excess water or drainage trouble. Mushrooms alone do not diagnose the cause.
Photograph the pattern and check irrigation coverage, soil contact, shade, grade, and drainage. Contact the installer promptly if sod arrived hot or deteriorated, seams separate, rooting remains poor, or large areas change color. Avoid herbicide or fertilizer additions unless the contract and turf-specific guidance call for them.
First-month checklist
- Sod installed promptly with tight staggered seams
- Underlying soil wetted after installation
- Moisture checked under edges in several zones
- Rain and weather included in daily decisions
- Runoff, ponding, and sprinkler gaps corrected
- Traffic restricted during weak rooting
- Gentle tug checks recorded
- Watering frequency reduced gradually after rooting
- First mow delayed until conditions are suitable
Limitations
No universal daily schedule fits every sod lawn. Grass species, soil texture, rooting depth, installation quality, slope, shade, temperature, wind, rain, irrigation output, and water restrictions change the plan. Local extension advice, the sod producer, and the installer’s written warranty requirements take priority.
FAQ
Should new sod be soggy?
No. The sod and soil should remain moist during early rooting, but saturation and standing water can create other problems.
Why are the edges drying first?
Edges lose moisture quickly and may have poor soil contact or weak sprinkler coverage. Check them directly and correct the cause.
When can people walk on it?
Limit traffic until roots hold the sod firmly and the surface supports use without shifting or denting.
Can rain replace irrigation?
Sometimes, but verify moisture below the sod. A brief shower may wet leaves without reaching the root zone.
Evidence notes
University extension guidance supports thorough initial watering, moist rather than saturated establishment conditions, traffic limits, and a rooting check before treating sod as established. Site evidence includes delivery condition, installation photos, irrigation output, under-sod moisture checks, rainfall, temperature, rooting resistance, and dated problem photos.
Conclusion
The first month is a transition from vulnerable rolls to rooted turf. Water the soil rather than the calendar, correct uneven coverage, protect weak sod from traffic, and use rooting—not a date alone—to decide when to reduce frequency and resume normal care.






 Maya-Bruns Landscaping4.0 (14 reviews)
 Good Earth LLC4.0 (63 reviews)
 Springhetti Luxury Outdoor Spaces4.0 (28 reviews)
 Martínez Pavers & Landscaping5.0 (5 reviews)
 Brose Lawn And Landscaping5.0 (4 reviews)
 Sunset Services US4.0 (33 reviews)
 How to Create a Front Yard That Requires No Mowing
 How to Landscape a Rooftop Garden for Relaxation | Beautiful Rooftop Designs
 How to Use Ornamental Grasses as Soft Barriers in Landscaping
 How to Maintain Outdoor Furniture & Hardscape Elements for Longevity
 How to Plan a Garden for Succession Blooming
 How to Design a Kid-Friendly Garden Space: Tips and Ideas