
Landscape Edging: Compare Steel, Stone, Plastic, and Concrete
On this page
Quick answer
Choose landscape edging by the boundary it must hold, curve radius, soil movement, mower access, visibility, and maintenance. Steel creates thin, durable lines; stone offers a substantial natural edge; plastic handles gentle curves at lower initial cost; and poured concrete creates a continuous permanent border. Mark utilities, drainage paths, roots, and finished height before digging.
This guide helps US homeowners compare options. Local soil, frost, heat, installation quality, and product specifications can change performance.

What landscape edging does
Landscape edging is a physical boundary between lawn, planting beds, paths, gravel, or mulch. It can slow material migration, define a mowing line, and give beds a consistent shape. It does not stop every weed, hold a structural slope, or replace a proper retaining wall.
Start with the job. A shallow mulch separator carries less load than a border retaining loose gravel beside a walkway. An edge beside active play space needs a different safety profile than one behind shrubs. Define the required height and pressure before choosing the look.

Compare edging materials
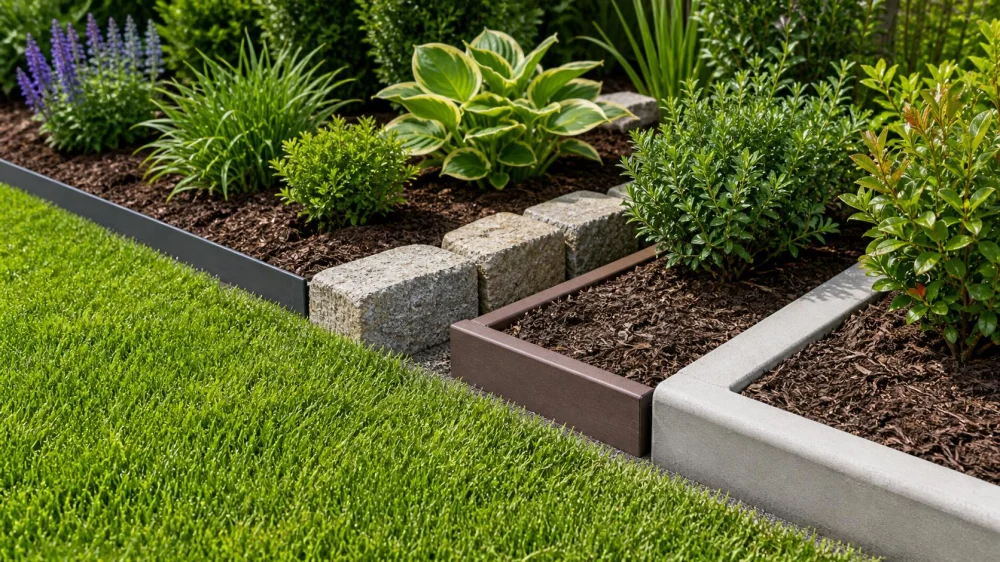
Steel edging is best for crisp straight lines and smooth curves where a narrow profile is desired. Properly installed steel can resist movement, but exposed sharp corners, corrosion conditions, and mower contact need planning. Powder-coated or weathering finishes age differently.
Stone edging suits naturalistic beds and visible borders. Individual pieces adapt to grade and are replaceable, but joints allow some material movement and weed growth. Heavy stone needs a stable base, careful lifting, and enough width for the intended line.
Plastic or composite edging is best for long gentle curves and projects that value flexibility. Thin products can lift, wave, or become brittle when poorly anchored or exposed beyond their intended height. Compare wall thickness, connector design, stake spacing, and temperature rating rather than judging all plastic alike.
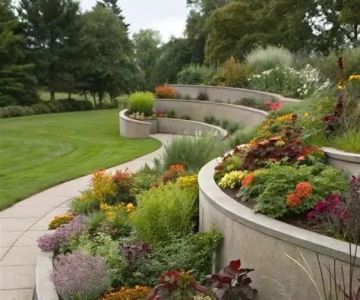
Poured or precast concrete edging creates a solid, visible separator and can form a mower-friendly strip. It is less forgiving when roots, frost, or future layout changes cause movement. Repair color and texture may not match the original.
Site checklist
- Trace the line. Use a hose or marking paint approved for the surface and view the curve from several angles.
- Locate utilities. Use the local utility-location process before digging, and remember private lines may need separate locating.
- Check roots. Reroute the edge rather than cutting major tree roots without qualified advice.
- Follow drainage. Do not create a dam that traps water against paving, foundations, or plant crowns.
- Measure grade. Note low spots and slopes where material pressure or runoff is greater.
- Plan equipment clearance. Confirm mower wheels, string trimmers, wheelchairs, carts, and gates can pass safely.
- Set finished height. The top should contain material without becoming a trip, cut, or tire hazard.
Installation questions
Ask the installer how the base is prepared, how deeply the edge is set, how joints and corners are finished, and how stakes or anchors are spaced. Request the manufacturer's installation requirements for the exact product. A material can fail early when it is set in loose organic soil or installed too high.
For curves, compare a full-size sample against the planned radius. Segmenting stiff material can create awkward points. For stone, confirm whether gaps are intentional and how the bed side is contained. For concrete, ask about control joints, curing protection, access, and how future repairs will be handled.
Document the route before it is covered, especially near irrigation tubing, low-voltage lighting, drainage pipe, and invisible dog-fence wire. Future maintenance crews need to know what crosses the edge.
Maintenance and limits
Inspect the edge after freeze-thaw cycles, heavy rain, mowing impacts, and soil work. Reset lifted sections before they become trip hazards. Remove trapped leaves that block drainage, replace missing anchors, and keep metal corners capped according to the product design.
Edging will not prevent aggressive roots or rhizomes unless it is specifically designed and installed as a root barrier. It also cannot stabilize a meaningful height of soil. Bulging, rotation, repeated washout, or a slope above the edge calls for a drainage or retaining assessment rather than more stakes.
Avoid installing a hidden hard edge where people may step, kneel, or fall. Near public sidewalks or property lines, verify local rules and survey boundaries before creating a permanent strip.
FAQ
Which edging is easiest to curve?
Flexible plastic, composite, and some thin metal systems handle broad curves well. Tight radii depend on the exact product and connector design.
Should edging sit above the lawn?
Only enough to perform its job without catching feet, mower decks, or tires. Follow product specifications and coordinate finished soil and mulch levels.
Can edging stop gravel from spreading?
It can contain lateral movement, but the base, gravel depth, traffic, and drainage still determine whether stone migrates.
Does metal edging damage trees?
Digging and root cutting can harm trees regardless of material. Map roots and adjust the route; consult an arborist when major roots are involved.
When is concrete not ideal?
Avoid it when the layout is likely to change, root growth is expected, or access for installation and future repair is poor.
Next steps
Photograph the current boundary, measure the total length and tightest curve, then mark roots, utilities, drainage, and access. Compare one installed sample of each practical material at the intended height before approving the full project.
Evidence note: This article reflects general landscape construction and safety principles. Product instructions, utility marks, local codes, and site-specific professional advice control the installation.


 Southern Indiana Boys Lawncare inc5.0 (1 reviews)
 Calafia Design0.0 (0 reviews)
 Beal Landscaping3.0 (7 reviews)
 BLC Lawn Care LLC4.0 (11 reviews)
 JRE Landscaping0.0 (0 reviews)
 Grams Lawn Service LLC5.0 (30 reviews)
 How to Landscape a Small Urban Backyard: Tips and Ideas
 How to Plan Vertical & Horizontal Plant Movement
 How to Use Shade Plants Under Trees
 How to Use Structural Plants for Yearly Framework
 How to Design With Texture, Height, and Form in Mind
 How to Incorporate Ornamental Trees Into Small Landscapes: A Beginner’s Guide