
- 1 - Choosing-The-Right-Stone
- 2 - Designing-Your-Pathway
- 3 - Preparing-The-Ground
- 4 - Laying-The-Stone
- 5 - Finishing-Touches-And-Maintenance
- 6 - Enhancing-Your-Project-With-Beautiful-Landscapes
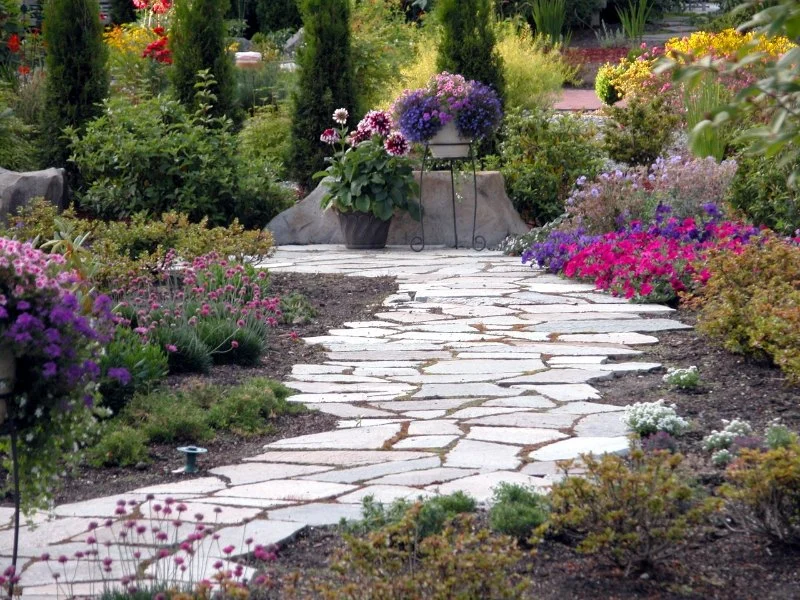
1. Choosing the Right Stone
Selecting the right natural stone is the foundation of a successful pathway. Factors to consider include:
- Type of stone: Flagstone, slate, bluestone, and granite are popular choices due to durability and aesthetic appeal.
- Size and shape: Irregular shapes provide a rustic, organic look, while uniform stones create a more formal, structured path.
- Color and texture: Choose tones that complement your home exterior and garden. Textured surfaces provide natural slip resistance.
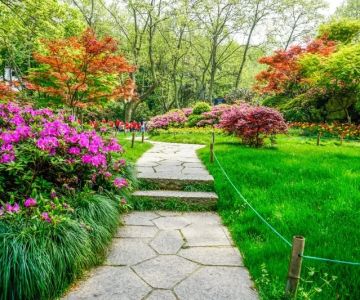
A homeowner in Colorado shared that switching from inexpensive, irregular bricks to professionally sourced bluestone from Beautiful Landscapes transformed their garden pathway into a visually stunning, long-lasting feature.

Landscape Material & Firewood Sales, Inc.
West ChicagoDuPage CountyIllinois
27W250 St Charles Rd, West Chicago, IL 60185, USA
2. Designing Your Pathway
Planning your pathway layout is crucial before breaking ground. Consider:
- Pathway route: Walk through your outdoor space and mark where natural traffic occurs to ensure functionality.
- Width: Standard pathways are 3–4 feet wide for comfortable walking, while garden paths can be narrower.
- Patterns: Herringbone, random, or linear patterns affect both style and installation difficulty.
Designing with intention helps avoid costly mistakes and ensures that the stone pathway integrates seamlessly with existing landscaping.

3. Preparing the Ground
Proper groundwork ensures longevity and stability of your pathway:
- Clear the area of grass, roots, and debris.
- Excavate to a depth of 4–6 inches for pedestrian pathways, slightly deeper for areas with heavy use.
- Lay a base layer of crushed stone or gravel to improve drainage and prevent shifting.
- Compact the base layer using a hand tamper or plate compactor.
One DIY landscaper from Oregon emphasized that taking extra time on preparation reduced stone shifting over the years, resulting in a professional finish without hiring heavy machinery.
4. Laying the Stone
Now comes the creative part – placing your natural stones:
- Start from one end, placing stones in the desired pattern.
- Maintain consistent spacing between stones for aesthetics and stability.
- Level each stone using a rubber mallet, checking for slight slopes to allow water runoff.
- Fill gaps with sand, gravel, or moss for a natural, integrated look.
Attention to detail during installation prevents future hazards, such as tripping, and ensures the pathway remains attractive over time.
5. Finishing Touches and Maintenance
Maintaining your stone pathway ensures it continues to look great for years:
- Regularly remove weeds and debris from between stones.
- Reapply sand or gravel to settle gaps after heavy rains.
- Seal the stone if necessary to enhance color and protect against stains.
- Consider landscape lighting along the path for safety and ambiance.
A couple in New Jersey installed subtle solar lights along their stone walkway, highlighting the texture and color of the stones while enhancing nighttime safety.
6. Enhancing Your Project with Beautiful Landscapes
For those seeking professional-quality materials, Beautiful Landscapes offers a curated selection of natural stones, tools, and guidance to bring your pathway vision to life. Using premium materials from trusted suppliers ensures durability, aesthetics, and peace of mind.
Many clients have shared that sourcing stones and landscaping advice from Beautiful Landscapes allowed them to complete their pathway projects efficiently, transforming ordinary yards into visually stunning outdoor spaces.

 Brandon Bussan Landscaping & Tree Service5.0 (2 reviews)
 Maker Enterprises | Dirt, Rock, Sand, Mulch, Compost Delivery Cedar Rapids, IA4.0 (17 reviews)
 D 2 Lawn & Tree Services4.0 (10 reviews)
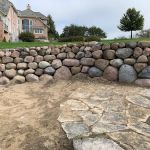 Elena's Landscaping llc4.0 (36 reviews)
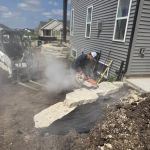 Magnolia Landscaping LLC5.0 (5 reviews)
 Opportunity Landscaping4.0 (42 reviews)
 How to Plan a Garden for Children’s Learning and Play
 How to Grow a Stunning Native Wildflower Border
 How to Use Mulch to Retain Moisture & Control Weeds
 How to Design With Movement: Plants That Sway Gracefully in Your Garden
 How to Grow Groundcovers That Replace Traditional Lawns
 How Often Should You Fertilize Your Lawn?