
- 1 - Benefits of a Paver Patio
- 2 - Planning and Designing Your Patio
- 3 - Preparing the Site for Installation
- 4 - Laying the Base and Sand Layer
- 5 - Installing Pavers and Patterns
- 6 - Finishing Touches and Maintenance
- 7 - Real-Life Case and Tips
1. Benefits of a Paver Patio
Installing a paver patio offers both aesthetic and functional advantages. Pavers provide durability, flexibility in design, and easy maintenance compared to poured concrete. A well-installed patio can enhance outdoor living, provide a space for gatherings, and increase your property's value.
Additionally, paver patios are resistant to cracking, offer a variety of color and pattern options, and allow for water drainage, which reduces puddles and erosion in your backyard.

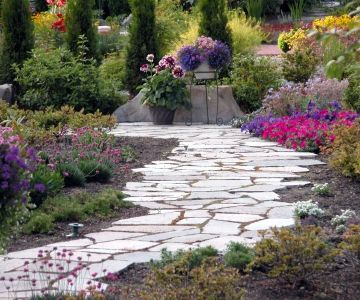
2. Planning and Designing Your Patio
Proper planning is crucial before installation:
- Measure Your Space: Determine the dimensions of the area where you want the patio.
- Choose Paver Style: Select the shape, color, and material of pavers that complement your garden and home exterior.
- Decide on Pattern: Common patterns include herringbone, basket weave, and running bond. Pattern choice affects stability and visual appeal.
- Plan Access Points: Ensure patios integrate smoothly with pathways, doors, and garden features.
3. Preparing the Site for Installation
Site preparation is critical for a stable patio:
- Clear the Area: Remove grass, roots, and debris from the intended area.
- Excavation: Dig down 6–8 inches to allow room for the base, sand, and pavers.
- Ensure Proper Slope: Maintain a slight slope (about 1/4 inch per foot) for water drainage away from the house.
4. Laying the Base and Sand Layer
The base provides stability and longevity for your paver patio:
- Base Material: Use crushed stone or gravel compacted in layers to create a firm foundation.
- Compaction: Compact each layer with a plate compactor for a level surface.
- Sand Layer: Spread 1–2 inches of coarse sand on top of the base to allow paver leveling and alignment.
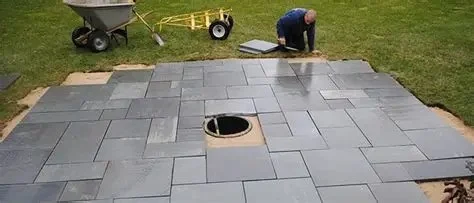
5. Installing Pavers and Patterns
With the base ready, start laying the pavers:
- Start from a Corner: Begin installation at a corner or straight edge for alignment.
- Follow the Pattern: Place pavers according to your chosen design, ensuring minimal gaps and consistent spacing.
- Cutting Pavers: Use a masonry saw to fit edges or irregular shapes.
- Check Leveling: Adjust pavers with a rubber mallet to keep a uniform surface.
6. Finishing Touches and Maintenance
After installing pavers, final steps ensure durability and aesthetics:
- Fill Joints: Spread polymeric sand into gaps and sweep off excess. Wetting activates the sand to lock pavers in place.
- Edge Restraints: Install plastic or metal restraints along edges to prevent shifting.
- Sealing: Apply a paver sealant to enhance color, reduce stains, and protect against weathering.
- Regular Maintenance: Remove debris, refill joints when needed, and clean pavers to maintain appearance.
7. Real-Life Case and Tips
Emily, a homeowner in Denver, transformed her backyard by installing a herringbone-patterned paver patio using locally sourced stone. By following a step-by-step approach—careful site preparation, proper compaction, and precise laying—she created a patio that has lasted five years with minimal maintenance. Emily recommends visiting Beautiful Landscapes for professional-grade tools and guidance, ensuring high-quality results.
By following this comprehensive step-by-step guide, anyone can create a durable and beautiful paver patio, enhancing their backyard's functionality and appeal.


 Jeff Voegeli Landscaping Inc4.0 (11 reviews)
 Muggy's Landscapes5.0 (5 reviews)
 Myers Landscape Nursery4.0 (43 reviews)
 J&M Lawn Care Service5.0 (3 reviews)
 Down to Earth Landscaping4.0 (79 reviews)
 Grand Designs Landscaping & Hardscaping LLC5.0 (3 reviews)
 How to Build a Sustainable Backyard Using Native Materials: A Step-by-Step Guide
 How to Design a Kid-Friendly Garden Space: Tips and Ideas
 How to Create Visual Flow Between Front and Back Yards
 How to Plan a Garden for Succession Blooming
 How to Build a Stone Retaining Wall That Looks Natural
 How to Plan for Emergency Drought in Landscaping