
- Why a Dry Creek Bed is Essential for Drainage
- Planning Your Dry Creek Bed Design
- Step-by-Step Guide to Building a Dry Creek Bed
- Enhancing Visual Appeal with Your Dry Creek Bed
- Maintenance Tips for Your Dry Creek Bed
Why a Dry Creek Bed is Essential for Drainage
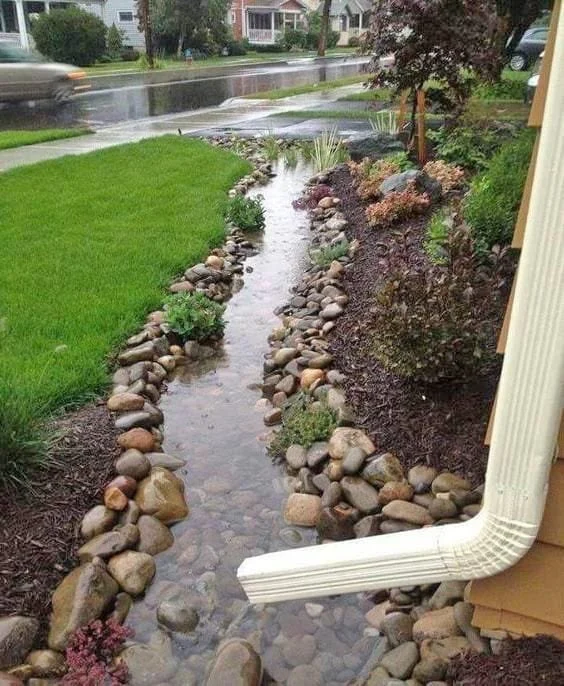
A dry creek bed is an effective and aesthetically pleasing solution for managing excess water and improving drainage in your landscape. It serves as a natural water runoff system, redirecting water away from problem areas and preventing erosion. Unlike traditional drainage systems, a dry creek bed mimics the appearance of a creek or stream, making it a functional yet visually appealing addition to your yard.
Whether you live in an area with heavy rainfall or struggle with standing water in certain parts of your garden, a dry creek bed can solve these problems by channeling water in a controlled and decorative way. Moreover, it adds a touch of rustic charm and beauty to any landscape, helping you create a more functional and attractive outdoor space.

Planning Your Dry Creek Bed Design
Before you begin building your dry creek bed, proper planning is essential. Start by identifying the areas in your yard that need drainage. Typically, dry creek beds are placed in low-lying spots or areas where water tends to collect. Consider the natural flow of water and the overall design of your landscape to ensure that your creek bed fits seamlessly into the environment.
Next, choose the right location. A dry creek bed should be positioned in a way that allows water to flow easily through it, without disrupting the surrounding landscape. Make sure the area has enough slope to direct the water into the creek bed. The slope should be gradual, ideally no steeper than 5%, to avoid erosion.
Additionally, decide on the size and shape of your creek bed. Will it be a small feature or a more expansive design? The shape can be curvy, meandering through your landscape, or straight, depending on your aesthetic preferences. You may also want to incorporate other elements, such as rocks, plants, or small bridges, to enhance the look and functionality of your dry creek bed.

Step-by-Step Guide to Building a Dry Creek Bed
Building a dry creek bed is a relatively simple process that can be completed over a weekend with the right tools and materials. Here’s a step-by-step guide to help you get started:
1. Gather Materials
You will need the following materials:
- Shovel
- Landscape fabric
- Rocks of varying sizes (from small pebbles to larger boulders)
- Gravel
- Edging material (optional, for a cleaner look)
2. Mark the Path
Use a hose or string to outline the shape of your dry creek bed. Ensure that the path follows a natural flow from high to low points, mimicking the path of water. This helps guide the water through the bed effectively. You can create gentle curves or keep it straight, depending on your landscape design.
3. Excavate the Area
Once the path is marked, begin digging along the outline. The trench should be about 6-12 inches deep and wide enough to accommodate your rocks and gravel. Be sure to create a slight slope to encourage water flow. If the area is particularly wet or prone to erosion, you may need to dig a deeper trench or reinforce the bed with additional materials.
4. Lay the Landscape Fabric
After excavation, spread a layer of landscape fabric along the bottom and sides of the trench. This will prevent weeds from growing through the rocks and gravel while still allowing water to flow freely. Be sure to overlap the fabric along the edges to ensure proper coverage.
5. Add the Gravel
Start by adding a layer of gravel at the bottom of the trench. This provides a solid base and helps with water drainage. The gravel layer should be about 2-3 inches thick, and it’s important to choose gravel that complements the rest of your landscape.
6. Place the Rocks
Now it’s time to add the rocks. Begin with the larger boulders, placing them along the edges of the creek bed. Fill in the gaps with smaller rocks and pebbles. This creates the natural look of a creek and allows water to flow smoothly over the rocks. Ensure that the rocks are stable and firmly in place.
7. Finishing Touches
To give your dry creek bed a polished look, you can add some additional touches. Consider planting low-maintenance plants along the edges to enhance the aesthetic appeal. Small shrubs, grasses, or ground covers can complement the rocks and add color and texture. You may also want to install an edging material to keep the rocks contained and prevent them from shifting over time.
Enhancing Visual Appeal with Your Dry Creek Bed
A dry creek bed not only serves as an efficient drainage solution but also enhances the visual appeal of your yard. Here are a few design tips to make your creek bed even more attractive:
1. Incorporate Varied Rock Sizes
Mixing different sizes of rocks can create a more dynamic, natural look. Larger boulders add drama, while smaller stones create texture and fill in gaps. Consider using rocks that match the color palette of your home or garden for a cohesive look.
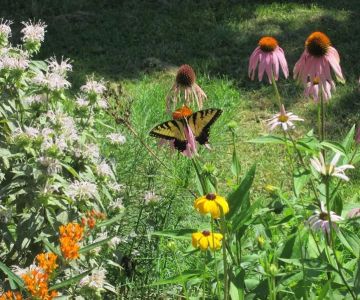
2. Add Water-Friendly Plants
Surround your dry creek bed with plants that thrive in well-drained soil. Choose plants that are native to your region to ensure they’re low-maintenance and suited to the environment. Grasses, sedges, and perennial flowers work well along the edges of dry creek beds.
3. Use Lighting to Highlight the Bed
Outdoor lighting can help highlight your dry creek bed, making it an attractive feature in your garden even at night. Install low-voltage landscape lighting along the edges or beneath rocks to create a soft glow and enhance the natural beauty of the area.
Maintenance Tips for Your Dry Creek Bed
Maintaining your dry creek bed is relatively simple. Here are a few tips to keep it in good condition:
1. Clean Out Debris
Regularly remove leaves, twigs, and other debris that may accumulate in the creek bed. This ensures that water can flow freely and prevents clogging.
2. Check for Erosion
Over time, some rocks may shift, and parts of your creek bed may become eroded. Inspect the bed regularly and make any necessary adjustments, such as adding more gravel or repositioning rocks.
A dry creek bed is a wonderful way to improve drainage and enhance the beauty of your landscape. With careful planning and attention to detail, you can create a feature that combines functionality and visual appeal. For more products and services to help with your landscaping, visit [Beautiful Landscapes].


 Changing Seasons Landscaping0.0 (0 reviews)
 Naturescene Lawn and Landscape Care4.0 (28 reviews)
 Imperial Lawns5.0 (42 reviews)
 Plant Center Inc4.0 (194 reviews)
 Walmart Patio & Garden Services0.0 (0 reviews)
 A&E Lawn and Tree5.0 (1 reviews)
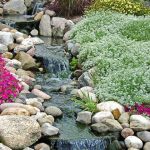 Best Ground Covers for Slopes & Erosion Control: Affordable and Effective Solutions
 How Often Should You Aerate Your Lawn?
 How to Plan Vertical & Horizontal Plant Movement
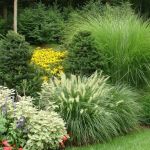 How to Use Ornamental Grasses as Soft Barriers in Landscaping
 How to Use pH Levels to Optimize Plant Growth
 How to Plan an Entryway Garden That Welcomes Guests