
- 1- Introduction to Stone Pathways with Natural Flow
- 2- Materials Needed for a Stone Pathway
- 3- Designing a Natural Flow Stone Pathway
- 4- Step-by-Step Guide to Building the Pathway
- 5- Maintaining Your Stone Pathway
1. Introduction to Stone Pathways with Natural Flow
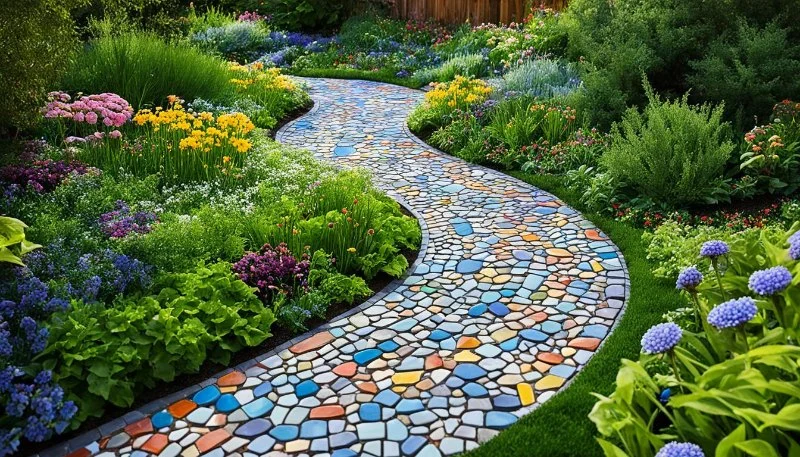
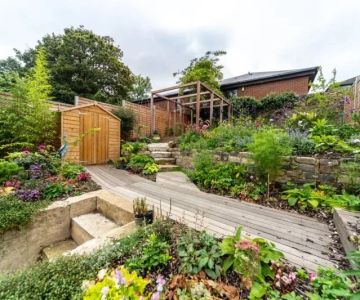
Stone pathways are a timeless addition to any garden or outdoor space. When designed with a natural flow, they blend seamlessly into the environment, enhancing the beauty of your landscaping. These pathways can provide functional routes through your garden while also serving as a design feature that elevates your outdoor space.
The concept of a "natural flow" is key when building a stone pathway. It’s not just about placing stones in a straight line; it's about creating a fluid, organic path that feels like it belongs in the natural surroundings. This type of pathway often follows the terrain’s natural contours, gently curving to create an inviting and aesthetically pleasing route.

Gielow's Outdoor Power Equipment
MilwaukeeMilwaukee CountyWisconsin
6643 N Teutonia Ave, Milwaukee, WI 53209, USA
2. Materials Needed for a Stone Pathway
Before starting your stone pathway project, it's important to choose the right materials. The type of stones and additional materials you use will impact both the look and durability of the path. Here's what you'll need:
- Stones: Choose natural stones like flagstone, slate, or river rock. Each has its own unique look and feel, and the choice depends on your garden’s style and color palette.
- Sand or Gravel: Used as a base material to provide stability and drainage for your stones. Sand is ideal for creating a smooth surface, while gravel offers more texture and drainage.
- Edging Materials: If you want a cleaner look, use edging materials like wood, metal, or stone to define the pathway’s borders.
- Weed Barrier Fabric: This helps prevent weeds from growing through the cracks in your pathway while allowing for proper drainage.
- Tools: Shovels, a rake, a level, a rubber mallet, and a shovel will be needed for digging and placing the stones accurately.
Choosing the right materials for your stone pathway is crucial to ensuring that it complements your garden design and remains durable over time.

3. Designing a Natural Flow Stone Pathway
Designing a stone pathway with a natural flow requires creativity and attention to detail. Here are some tips to create a harmonious, organic path:
- Follow the Terrain: Let the natural shape of your garden guide the pathway. If your garden has a slope, allow the pathway to meander gently rather than following a straight line.
- Vary the Stone Sizes: Mixing different sizes and shapes of stones will create a more natural, rustic look. Avoid using stones that are all the same size, as this can create a uniform, artificial appearance.
- Use Curves: Avoid sharp angles and instead incorporate gentle curves. Natural pathways rarely have straight lines, so adding curves will make your pathway feel more fluid.
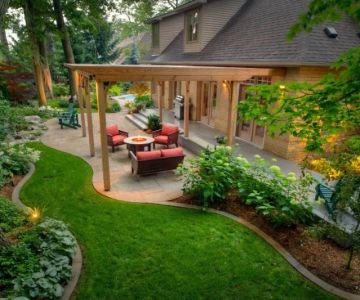
- Blend with Surroundings: Consider the colors and textures of your surrounding plants and landscaping. Choose stones that complement the natural colors of your garden.
By keeping the design flexible and adapting to the landscape’s features, you’ll be able to create a pathway that feels like a natural extension of the environment.
4. Step-by-Step Guide to Building the Pathway
Now that you’ve designed your pathway, it’s time to start building. Here’s a step-by-step guide to help you construct your stone pathway:
- Mark the Path: Use a garden hose or string to outline the shape of the path. Make sure the path follows the natural contours of your garden.
- Prepare the Ground: Dig a trench along the path outline, ensuring that it’s deep enough to accommodate your stones and the base layer. The depth will depend on the thickness of your stones and the base material.
- Lay the Base Material: Spread a layer of sand or gravel along the trench. Use a rake to smooth it out evenly and make sure it’s level. This will create a solid foundation for the stones.
- Place the Stones: Start placing the stones along the path. Use larger stones for the base and smaller stones to fill the gaps. Leave space between the stones to allow for drainage and plant growth.
- Level the Stones: Use a rubber mallet to tap each stone into place, ensuring that they’re level and secure. Fill any gaps with sand or gravel to keep the stones in place.
- Edge the Path: If desired, install edging materials along the sides of the pathway to keep the stones from shifting over time.
By following these steps, you’ll be able to create a stone pathway that not only looks beautiful but is also durable and functional.
5. Maintaining Your Stone Pathway
Once your stone pathway is complete, it’s important to maintain it to keep it looking its best. Here are some maintenance tips:
- Weed Control: Periodically remove any weeds that grow between the stones. Use a weed barrier fabric to minimize weed growth.
- Repairing Shifting Stones: If any stones shift over time, use a rubber mallet to tap them back into place. You may need to add more gravel or sand to maintain the level.
- Cleaning: Sweep the stones regularly to keep them free from debris. You can also pressure wash the stones occasionally to remove dirt buildup.
- Replenish the Gravel: Over time, the gravel around the stones may wear down. Replenish the gravel as needed to maintain the look and function of your pathway.
Regular maintenance will ensure that your stone pathway remains a beautiful and functional feature in your garden for years to come.
For more landscaping ideas and products to enhance your garden, visit Beautiful Landscapes for a variety of products and services.

 Choice Landscape & Lawncare5.0 (2 reviews)
 Schmidt's Services5.0 (7 reviews)
 Bear Landscaping and Snow Removal LLC4.0 (20 reviews)
 Waterfalls and Landscaping Co.0.0 (0 reviews)
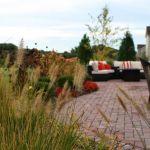 Kalamazoo Garden Design & Maintenance4.0 (24 reviews)
 Josh Newsome's Tree Surgery4.0 (59 reviews)
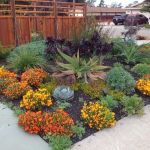 Best Native Plants for Drought-Tolerant Landscaping: A Guide for Sustainable Gardening
 How to Create a Butterfly Pathway Through Your Garden
 How to Revive a Neglected Lawn Step by Step
 How to Plan Outdoor Fire & Water Features Harmoniously
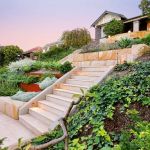 How to Deal With Sloped Yards: Terracing & Retaining Walls
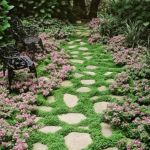 How to Use Perennial Borders to Frame Walkways: Tips for Stunning Garden Designs